
I remember thinking when I was younger, watching my mom try to brown frozen hamburger “wouldn’t it make more sense to thaw this first?” And then I became a wife/mother (let’s be honest, even cooking for two can be stressful sometimes), and I realized “heck yeah it would be easier to thaw it first, but who has that kind of time/forethought??”
I still have this problem 90% of the time. I’m staring into my fridge/freezer, it’s about 5:49, and I need to find something to make for supper. “Hey! We have stuff for tacos! I’ll just grab a pound of hamburger….. oh darn. We’re not gunna eat for another 30 minutes cuz I didn’t set this hamburger out earlier. Ugh I’m so hungry” and then you end up throwing that pizza in the oven instead, or you get all your anger out on that solid brick of meat trying to brown it before your kids have major mega melt downs.
Well, I have a solution for you, and when I heard about it, I remember thinking “that is the most genius and simple solution I’ve ever heard.” My aunt used to do this when she had 3 kids at home, and worked full time as a teacher, and it saved her A TON of stress.
The key is to reverse your cooking process. Instead of freezing hamburger, then thawing it (or not thawing it, if you’re a last minute chef like me), and browning it, I brown hamburger, freeze it, and then cook with it! It truly is life changing. The other day I ran out of frozen browned hamburger and audibly groaned when I realized that I’d have to brown hamburger for spaghetti. It was awful.
Read on to avoid the time-wasting mistakes I made the first time I did this:
1) Thaw hamburger/buy hamburger
My family raises cows, so we usually have a large shelf of our freezer full of ground beef. I first start out by taking a bunch of packages and setting them on a cookie sheet and put it in the fridge overnight (make sure the cookie sheet has sides, unless you REALLY love wiping out your fridge). I usually do about 15 pounds of hamburger at a time, unless I’m feeling REALLY ambitious, or know I won’t be able to do this again for a long time, like before I have a baby, I make sure I have a ton of browned hamburger ready in my freezer. That way even my husband can make dinner, which is pretty impressive since he didn’t know how to make macaroni and cheese out of a box when I met him (if you’re reading this babe, I’m sorry, and I love you 😉 )
2) Brown hamburger
When I first started doing this, I would brown hamburger one pound at a time, and it took FOR-EV-ER. Now, I do 3-4 pounds at a time, brown them all in one pot, and then divide it evenly after they’re browned.
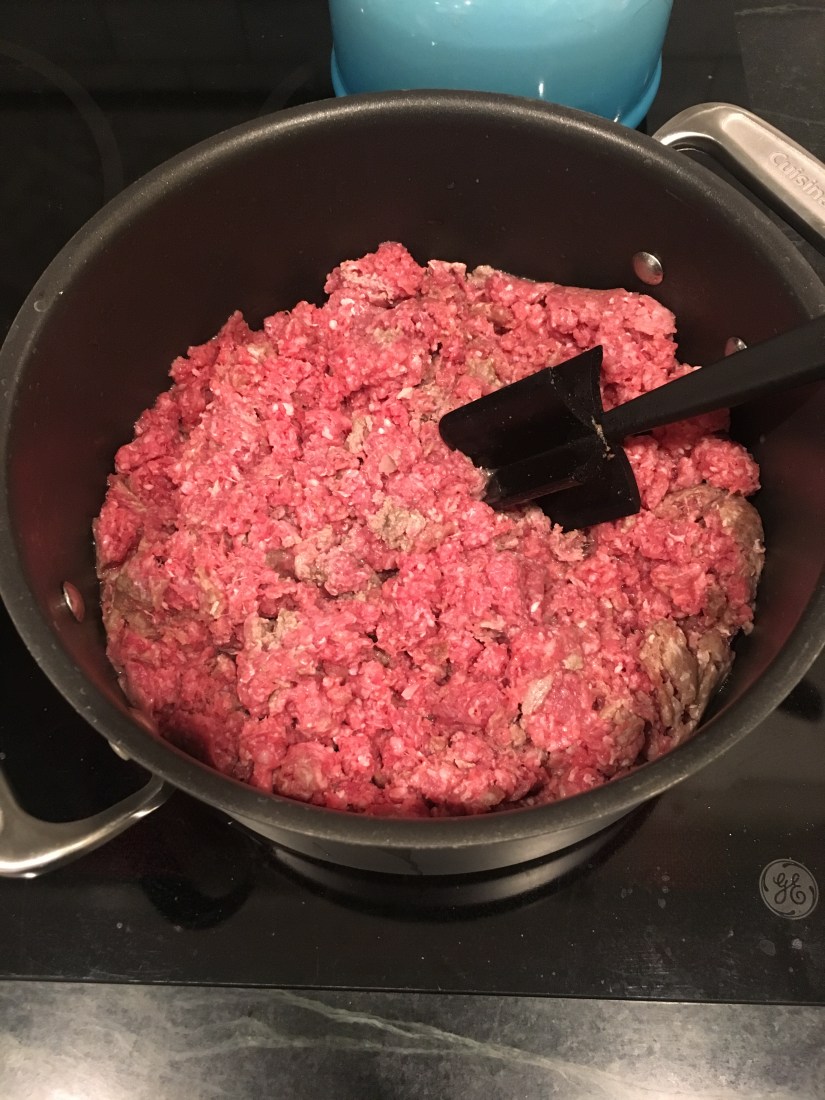
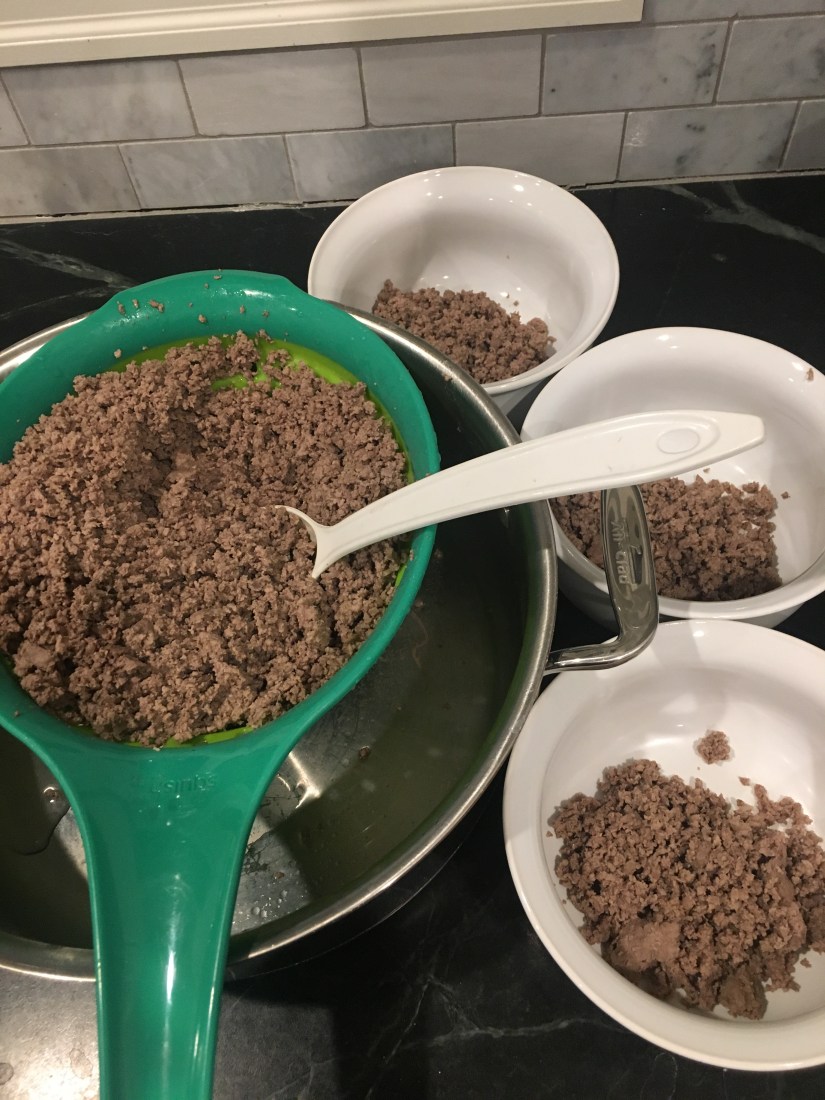
I also like to brown my hamburger with water in it, because it makes getting it into tiny little chunks a lot easier, it cooks faster, and more evenly too. No more of those big, hard chunks of meat at the bottom of the pan. I also rinse my hamburger after browning too. Not a lot, usually I just run water in the pan after I dump it in the strainer, swirl it around to get all the little chunks of hamburger that stuck to the sides, and pour it over the strainer. Although, I would warn against doing both of these things if you have a low fat percentage in your hamburger, as that would take a lot of the fat out, and therefore, a lot of the flavor.
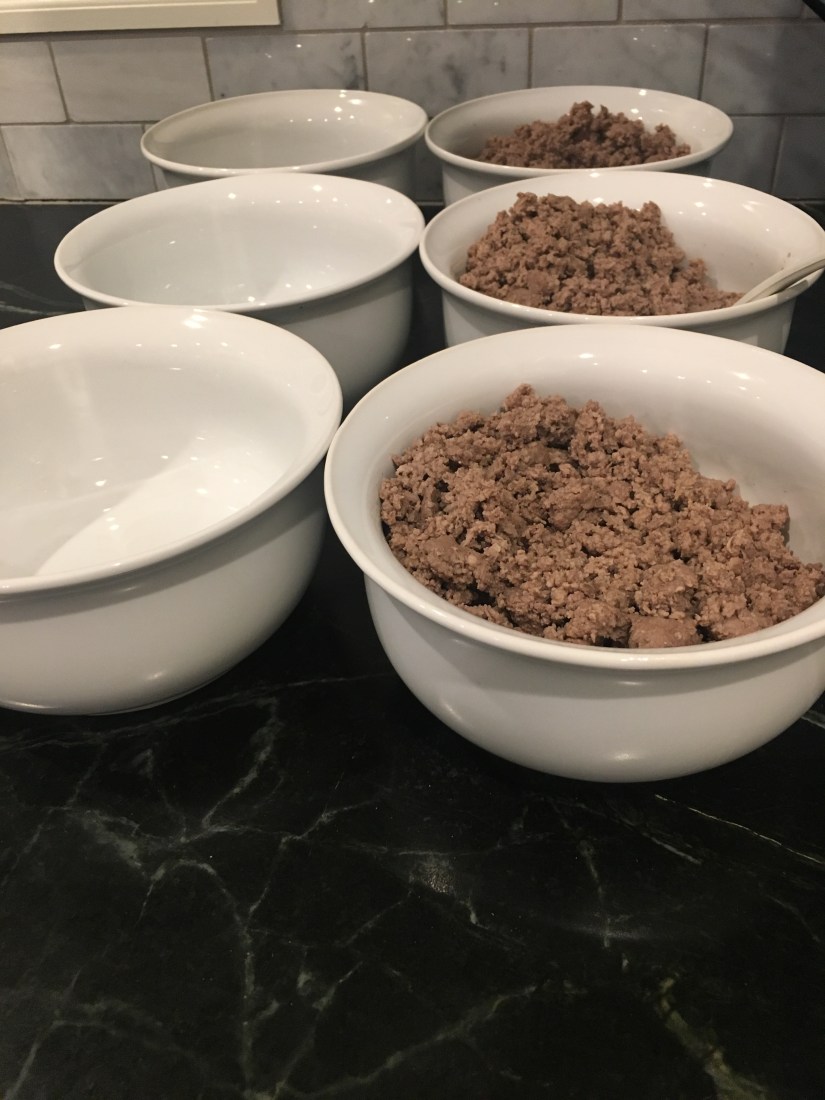
3) Divide into 1 pound sections, and let cool
After I’ve browned 3 pounds, I set out 3 bowls and divide the hamburger between those evenly, and let cool while I cook the next 3 pounds. It usually doesn’t take a very long time to cool, usually just until I need to use the bowls again, about 10 minutes.
Last night when I was browning all the hamburger, I was using two pans, so I needed double the bowls for cooling.
4) Transfer to freezer bags
After the meat has cooled a little bit, transfer the meat to freezer bags. One pound of ground beef fits into a 1 quart bag pretty perfectly. I usually let them cool a little longer before sealing them if they’re still a little warm
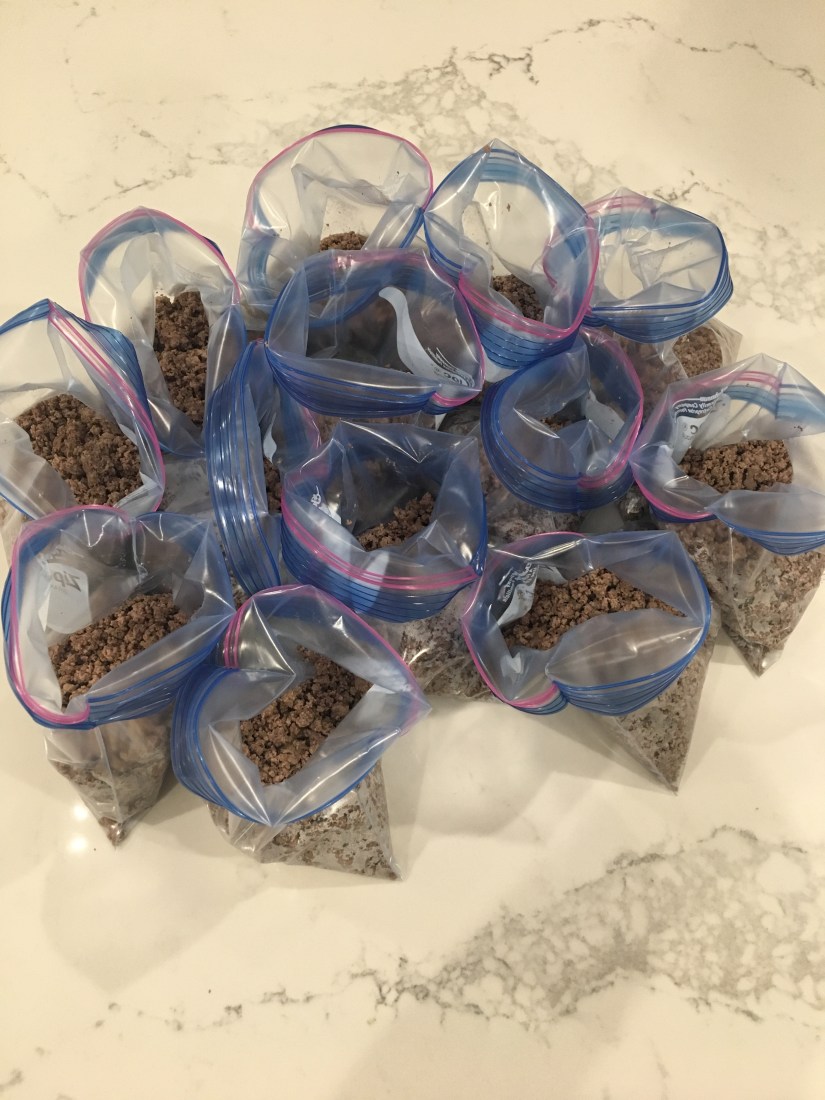
Then roll them up and seal them. Get as much air out as possible, as this will prevent freezer burn.
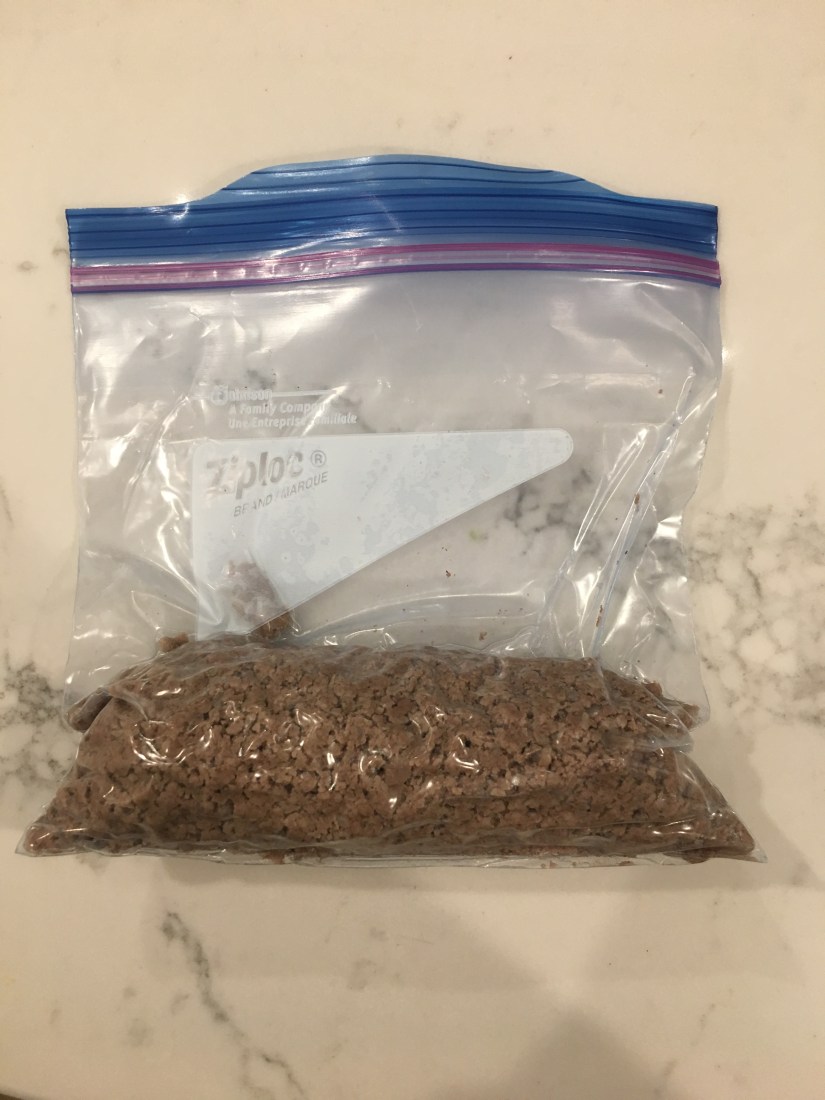
Then, flatten them out so they store easier in your freezer and you’re almost done!

I would suggest storing them in your freezer laying flat like these are right now, and then you can stand them up once they are frozen. I like to store them in the door of my freezer standing up, since I never know what to use the door space for anyway, and then you know exactly where all your meat is, and how much you have left. No more digging around in the freezer only to find out you have no more browned meat frozen and you have to use the block of frozen uncooked meat (UGH!). In all, I browned and prepared 13 pounds of hamburger in maybe 40 minutes? and it saved me probably 20 minutes per pound if I were to brown it when I needed it. We need all the time we can get these days!
You can also season the meat ahead of time too, like for tacos or in a sauce, or whatever you use browned beef for the most. I choose to leave it plain, which makes preparation just a touch longer when I need it, but that way I don’t have to worry about trying to decide if I want to use taco meat in my spaghetti sauce if I’m out of plain stuff.
You can also do this for shredded chicken, or shredded pork, or really anything. I LOVE having a freezer full of prepared food, or partially prepared food, especially before a busy season in life, like a new baby or school starting, or summer break- no one wants to be inside cooking when they can be outside doing something fun. You can even pre-mix spaghetti sauce and hamburger and freeze that, or creamed chicken (if you haven’t tried creamed chicken and biscuits, you are seriously missing out- pinterest it, you will not be sorry).
My advice for freezing shredded chicken or pot roast or shredded pork is to make sure you have some broth and juice in there with it, otherwise it will get very very dry. I like to cook my chicken in the crock pot with a can or two of chicken broth and then enough water to mostly cover the chicken. This leads to super moist chicken that’s really easy to shred. Try to do a ladle or so for a 1 quart bag of shredded meat.
Now, next time it’s 10 minutes before dinner time, and you have had no time to plan or even think about what to make, no need to stress! Take that bag out of the freezer, break it in half (you can put it under some hot water for 2 minutes or so if it’s hard to break) and throw it in a pan. Taco meat in under 10 minutes! You can even start seasoning it before it’s completely thawed, just mix it up a bit before you’re done. Good to go!
If you like this tip and want more, be sure to follow me on instagram (@summergraceblog) and check back here for more!
And above all, be nice to yourself
